How to Grant Uprise Digital Access to Your Meta Ads Account
To let us manage and run your Meta (Facebook and Instagram) Ads, please follow these steps to add Uprise Digital as a Business Partner.
Part 1: Granting Uprise Digital Partner Access
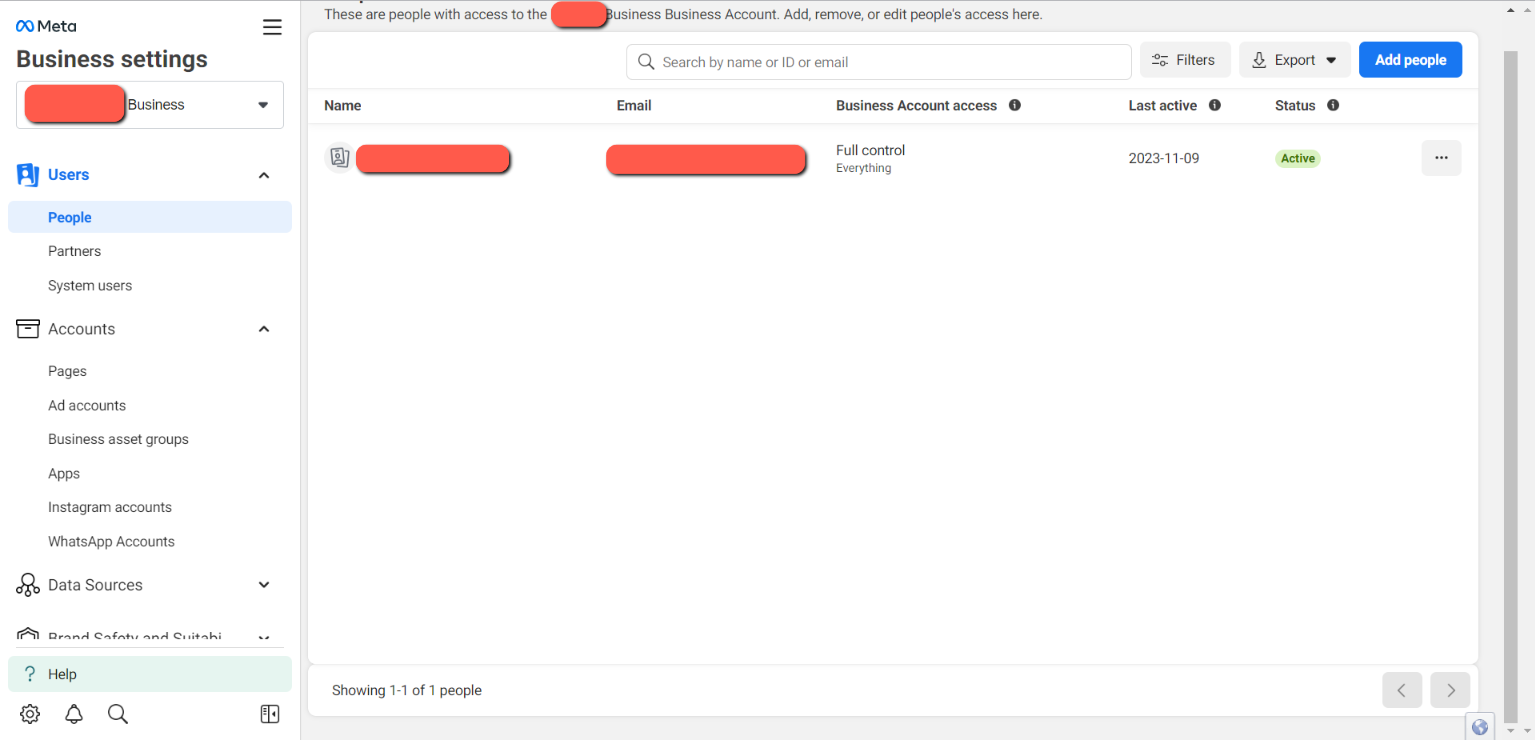
Step 1: Navigate to Business Settings
- Go to Meta Business Settings and log into your business account.
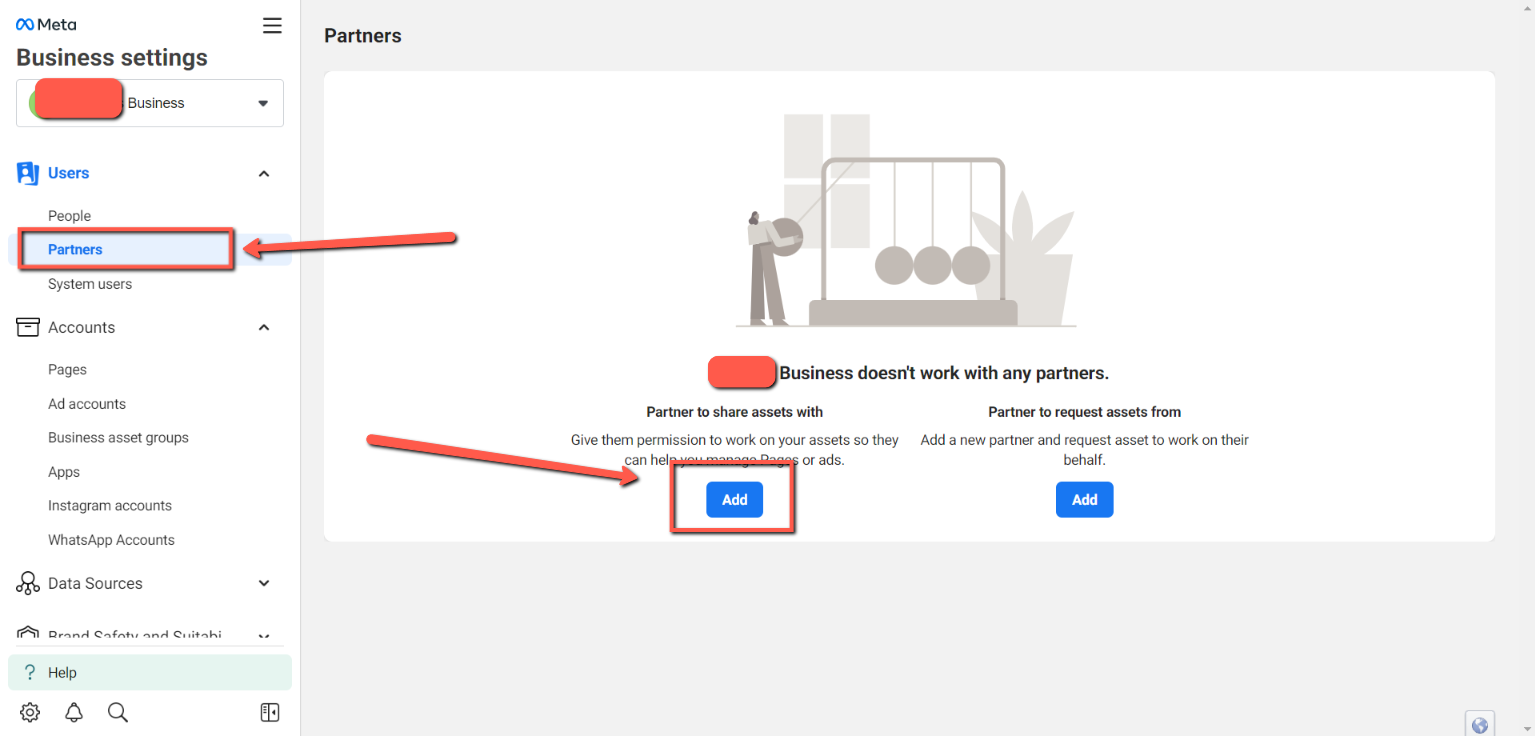
Step 2: Open Partners Panel
- Under Partner to share assets with, click the blue Add button.
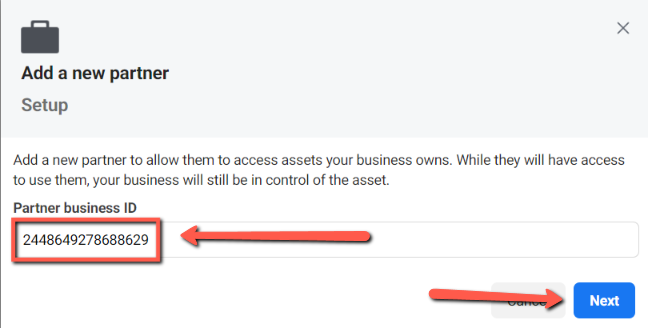
Step 3: Enter Uprise Digital's Partner ID
- Click Next to proceed.
2448649278688629
Step 4: Share Your Facebook Page Access
- Scroll down under the rights list to find Partial access (business tools and Facebook), and toggle Content, Messages, Community activity, Ads, Insights to On.
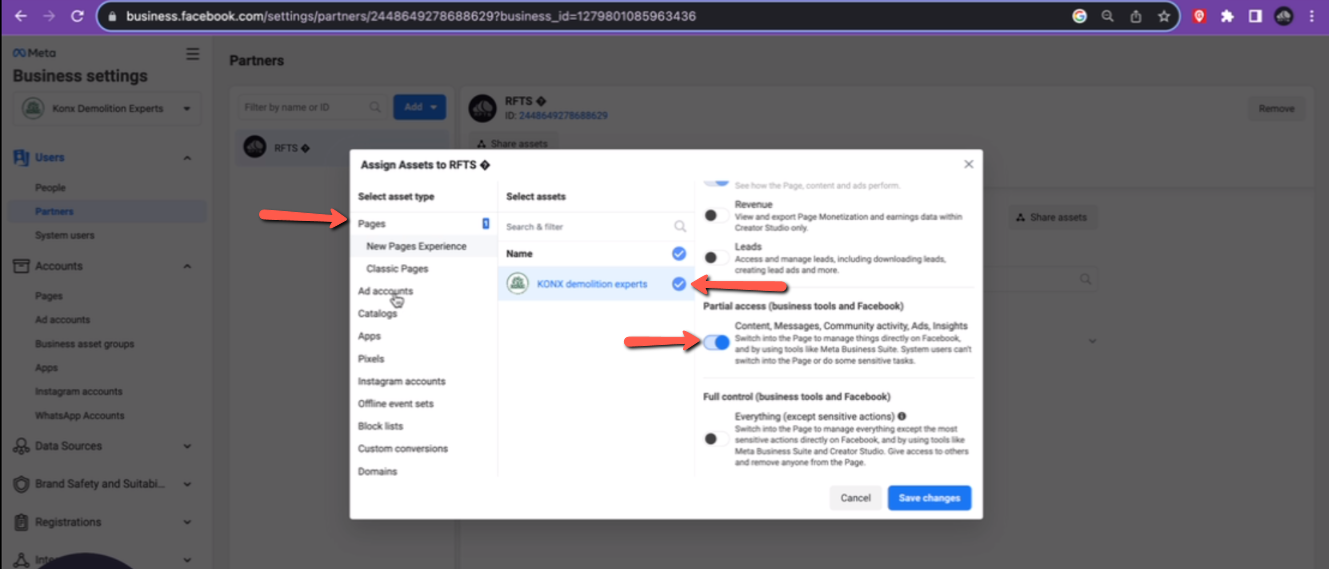
Step 5: Share Your Ad Account Access
- Confirm your choices by clicking Save changes.
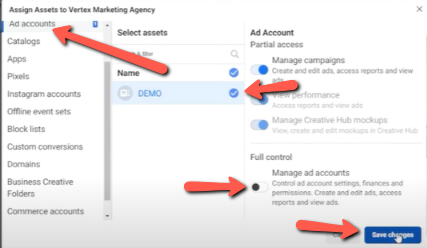
That's it! You have successfully given Uprise Digital access to create and manage your Meta ads.
Part 2: How to Create Your Ad Account (If You Don't Have One)
If you do not have a Meta Ad Account set up yet, follow these steps to create one:
Step 1: Open Accounts Menu
- Click the blue Add dropdown button and select Create a new ad account.
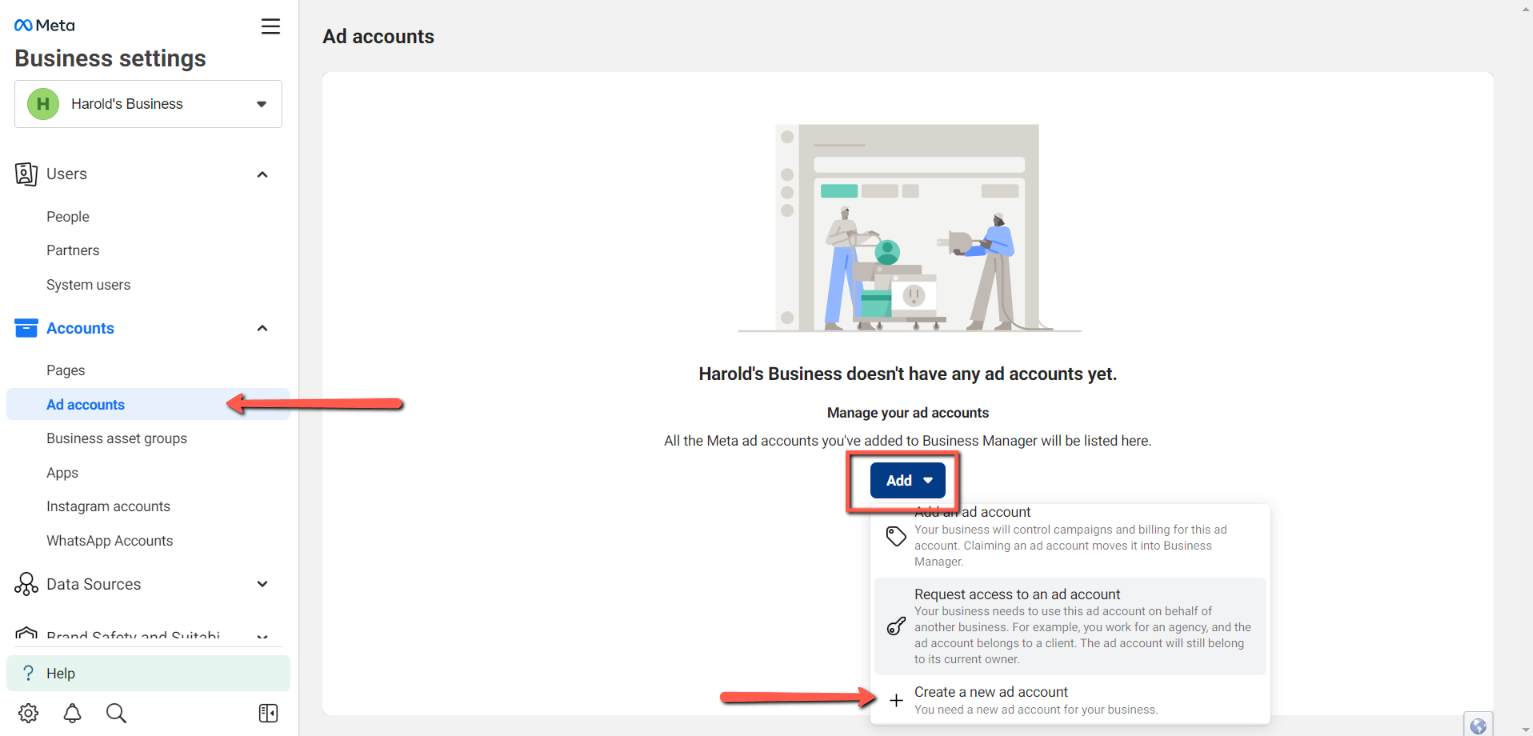
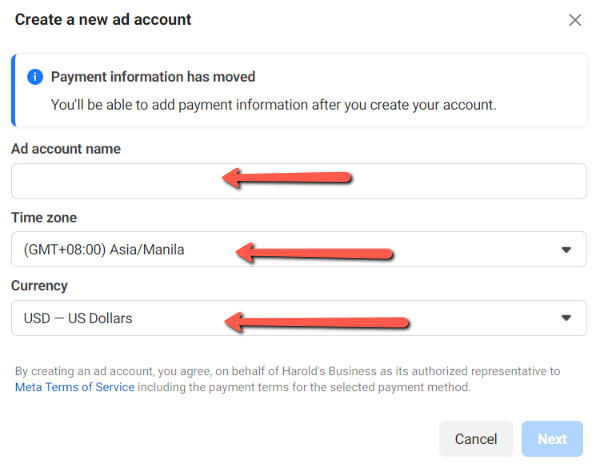
Step 2: Configure Account Details
- Input your advertising account details:
[Your Brand Name] Ad Account)
* Time zone
* Currency (USD, AUD, etc.)
- Click Next and follow the prompts to save your new ad account.
Note on Billing
You will be prompted to add payment information after creating the account. Uprise Digital cannot run ads until a valid payment method is attached to your account.